Mount and prealign a sample
Important note: The sample support-to-beam axis distance is adjustable between 40 - 70 mm.
Any samples with mounts that are longer than 70 mm will not fit on the instrument!
Mounting the sample
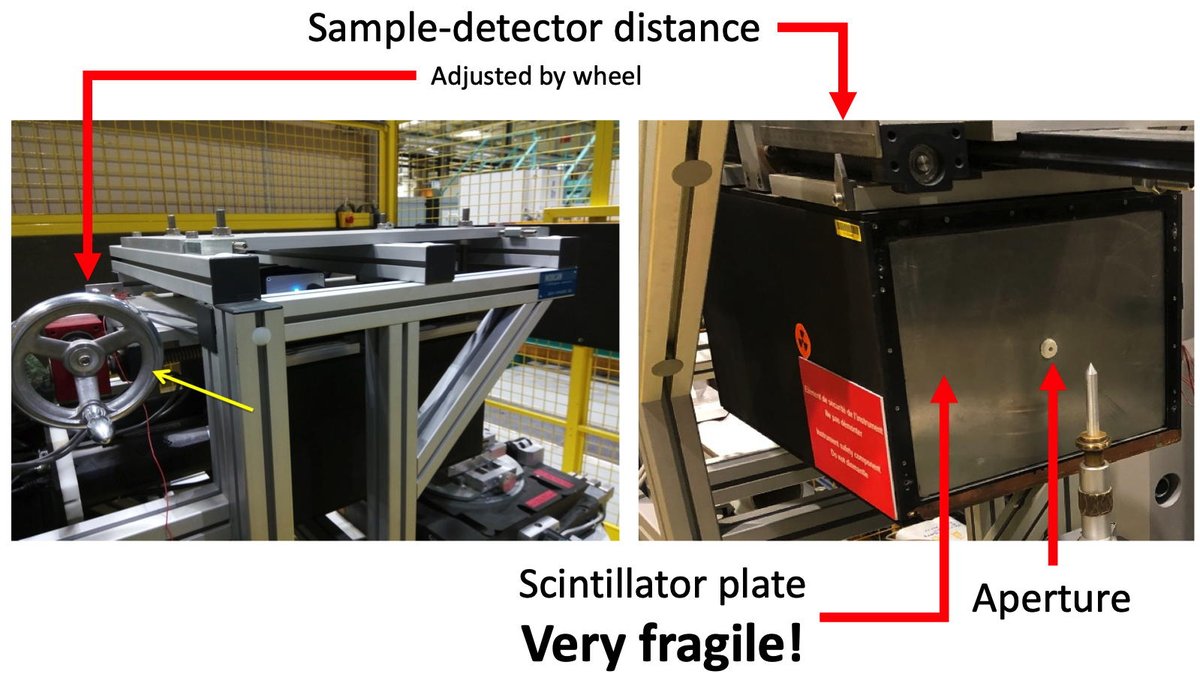
Take care not to bump or tap the detector. It is very fragile and may be damaged.
It is recommended that you move the detector away from the sample position when manipulating samples. You can move it back once you're done.
Use the wheel behind the detector to move it.
The sample position has a standard goniometer mount.
It also has an M6 tapped hole. Standard sample mounts for ILL dilution experiments must terminate in an M6 male thread.
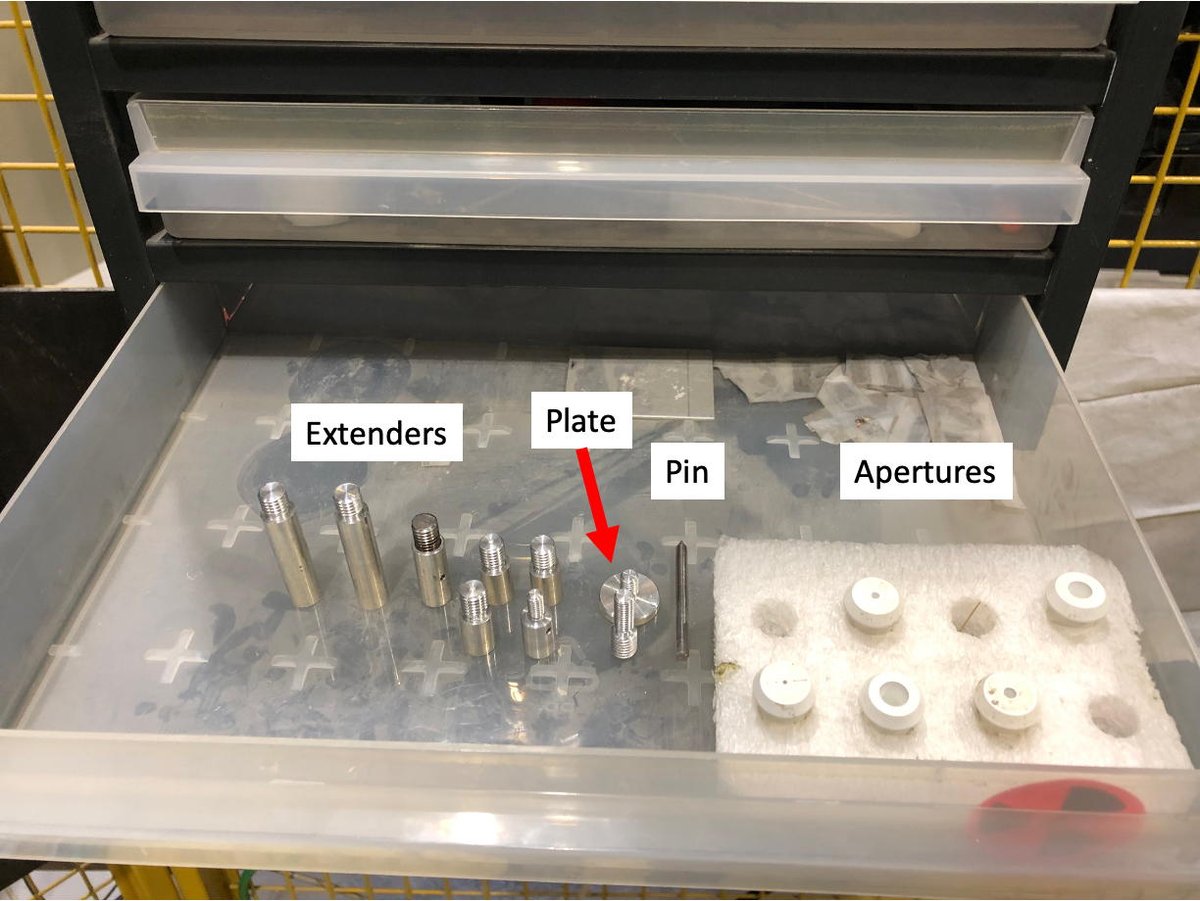
The useful drawer contains a number of adapters and extenders, including M6 male-M8 male adapters. Note that the standard sample mounts for orange cryostats must terminate in an M8 female thread.
ANYTHING TAKEN FROM THE DRAWERS MUST BE RETURNED TO THE DRAWERS at the end of the measurement.
If your sample support does not terminate with a:
- M8 female thread (ILL standard for cryostats)
- M6 male thread (ILL standard for dilution sticks)
- standard goniometer interface
then you will need an appropriate adapter. Please speak with your local contact to arrange one.
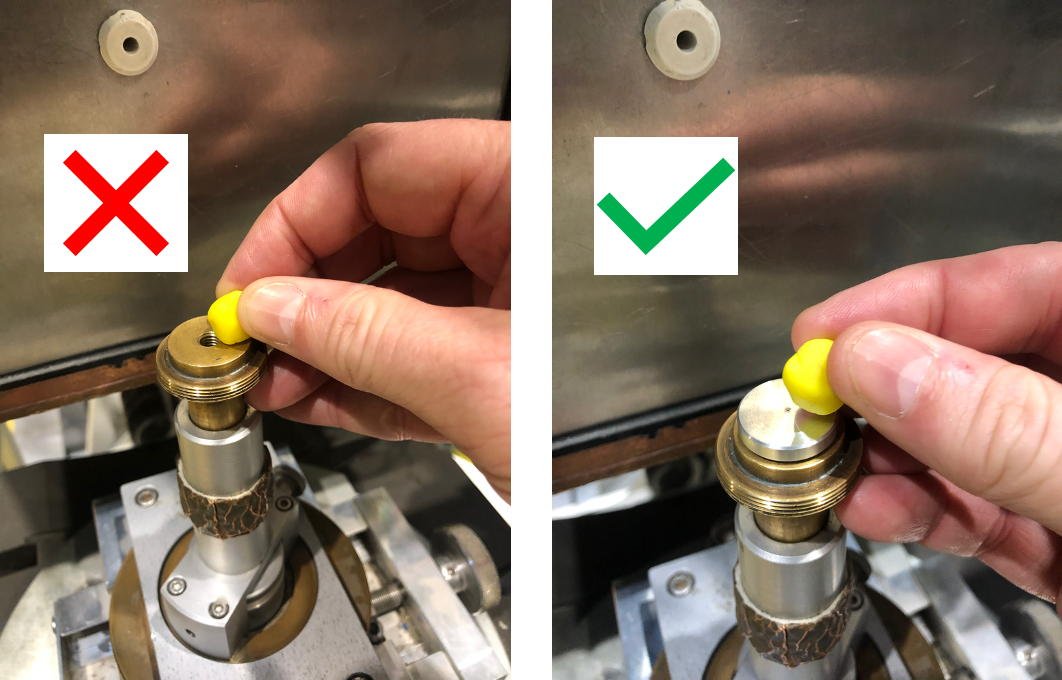
Non-mounted samples may be held in place using the wax-based modelling clay found in the useful drawers.
Do not put the clay over any treaded holes or extender threads as it's a bugger to get off and will gum up the threads. Please use the provided plate if you need to use the modelling clay to mount your sample
Prealigning the sample
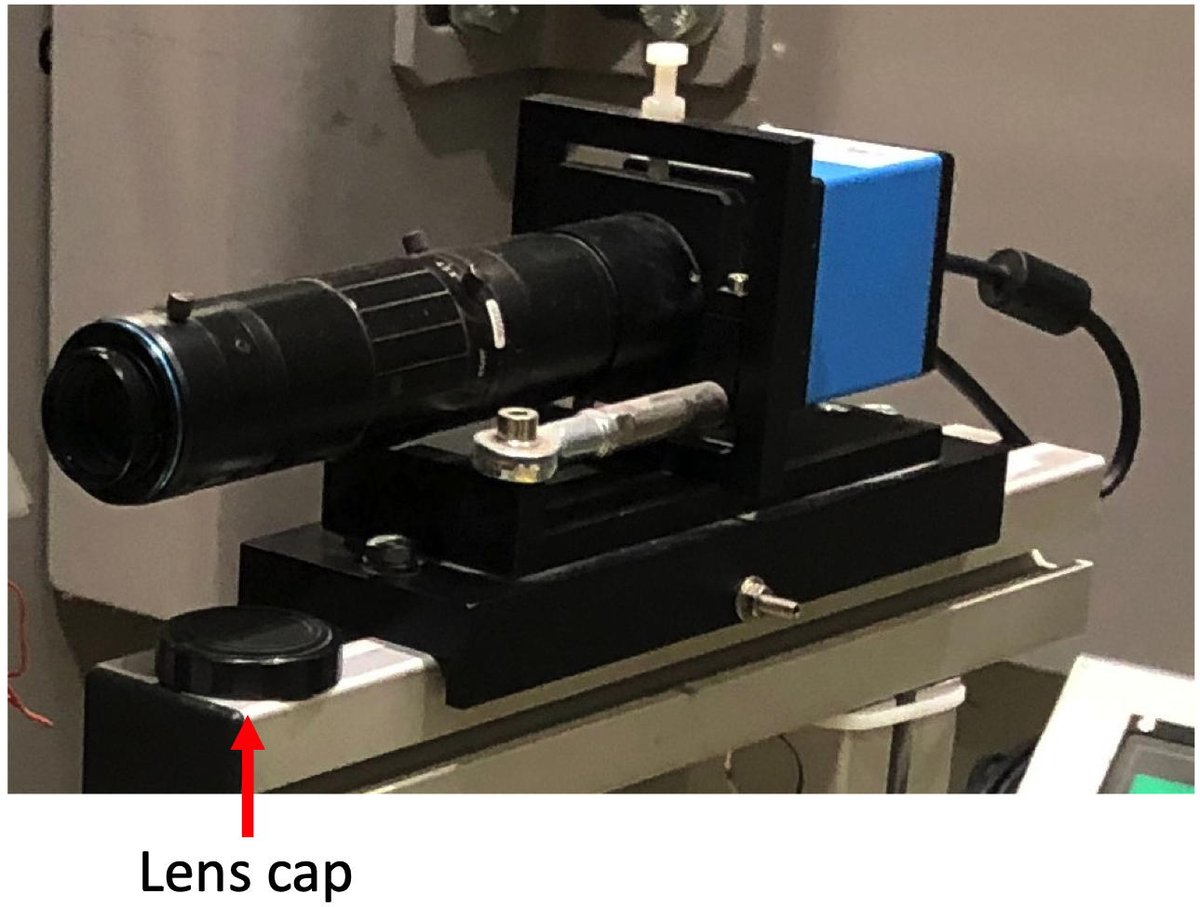
Samples may be quickly and accurately aligned using the camera in the experimental zone.
Be sure that the lens cap is removed from the camera.
The camera is driven using NOMAD.
To view the sample position with the camera:
- Choose the Settings tab in the left-hand panel of NOMAD.
- Select Instruments : Acquisition : Setting : LiveCamera
- A Delay of 100 ms is appropriate.
- Click the Play (►) icon in the bottom right of the NOMAD screen.
The green solid circle icon labelled Idle will change to a green open circle icon labelled Running.
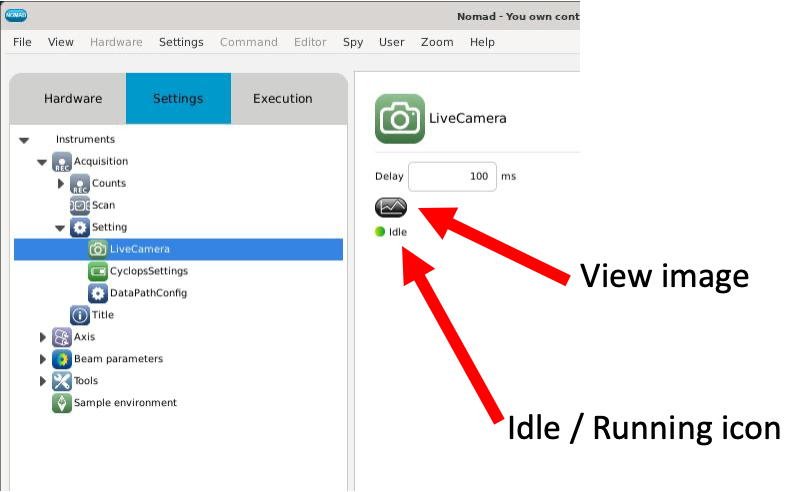
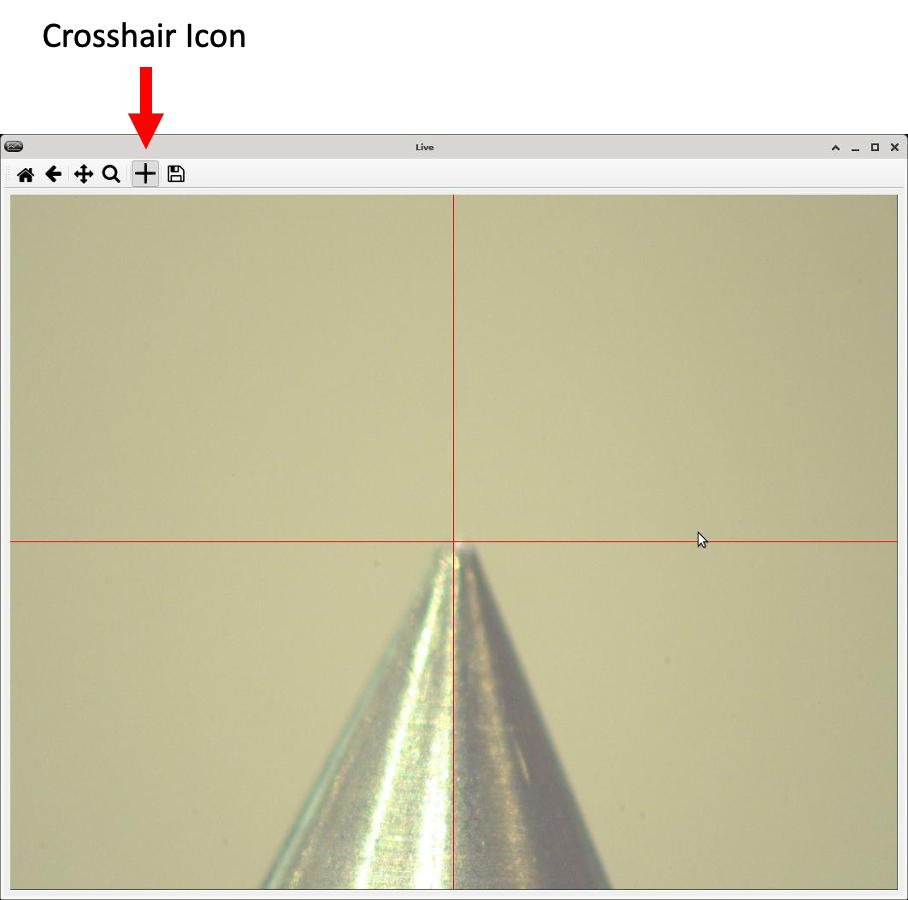
Click on the View Image icon to open the camera window,
The beam axis and centre of rotation of the sample table are marked with a crosshair.
If the crosshair is not visible, click the Crosshair Icon on the top of the camera window.
Use the Mirrored Monitor inside the experimental zone which mirrors the right-hand monitor outside the experimental zone. Make sure that the camera window is visible monitor and enter the zone.
IMPORTANT NOTE:
The camera uses computer resources. Once your sample is aligned, Stop (■) the camera by clicking on the appropriate button in the bottom right of the NOMAD screen.
The green open circle icon labelled Running will change back to a green solid circle icon labelled Idle.
The sample stage has a number of axes for position and angle adjustment.
The sample support-to-beam axis distance is adjustable between 40 - 70 mm. Any samples with mounts that are longer than 70 mm will not fit on the instrument!
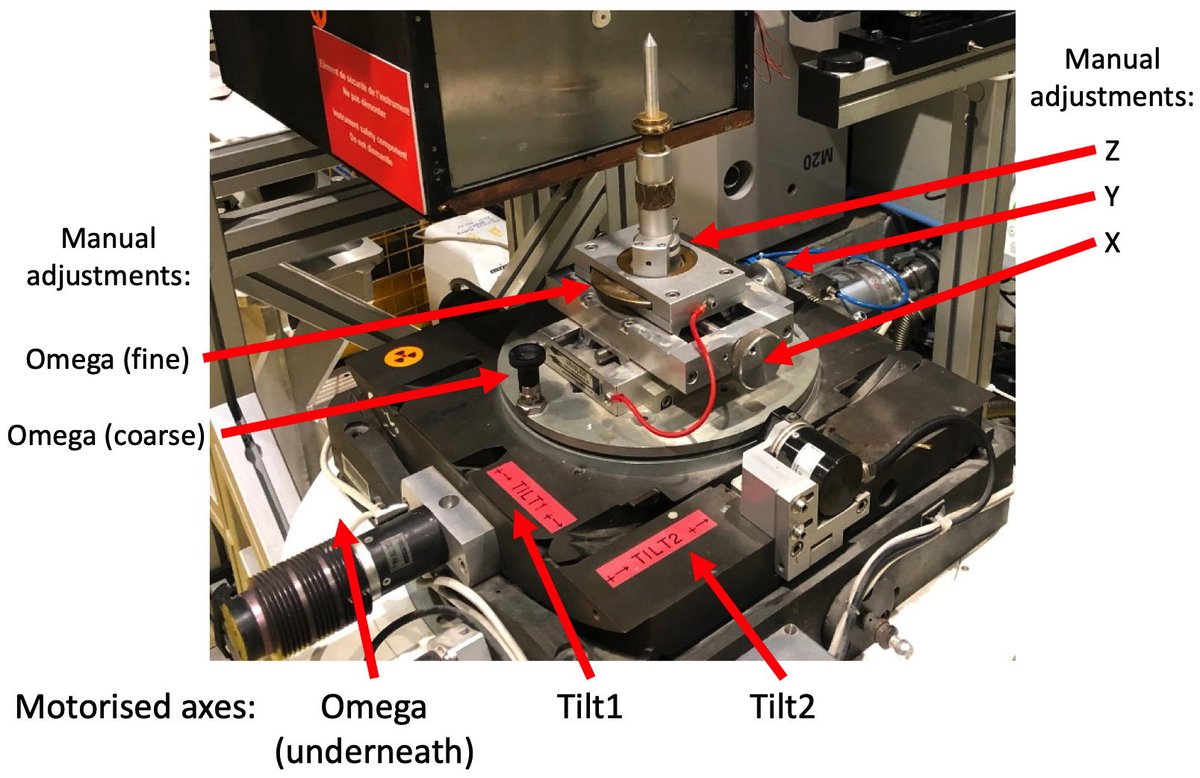
- Use the Manual Position Adjustments for X, Y, and Z to centre the sample on the cross in the NOMAD Camera window.
- Use the Coarse-adjust for omega to rotate the sample quickly by increments of 90°. Again, use X and Y to align the sample on the crosshair in the NOMAD camera window.
Your sample is pre-aligned once it is centred in Nomad Camera crosshair for the 90° increments.
If you wish, use the Fine-adjust for omega to orient your sample with respect to the incident beam. Be careful to loose the locking nut if you want to use the fine-adjust.
IMPORTANT NOTE:
The camera uses computer resources. Once your sample is aligned, Stop (■) the camera by clicking on the appropriate button in the bottom right of the NOMAD screen.
The green open circle icon labelled Running will change back to a green solid circle icon labelled Idle.
Trouble shooting
The camera is the fastest and easiest way to align the sample.
If the camera does not work, call the instrument responsible.
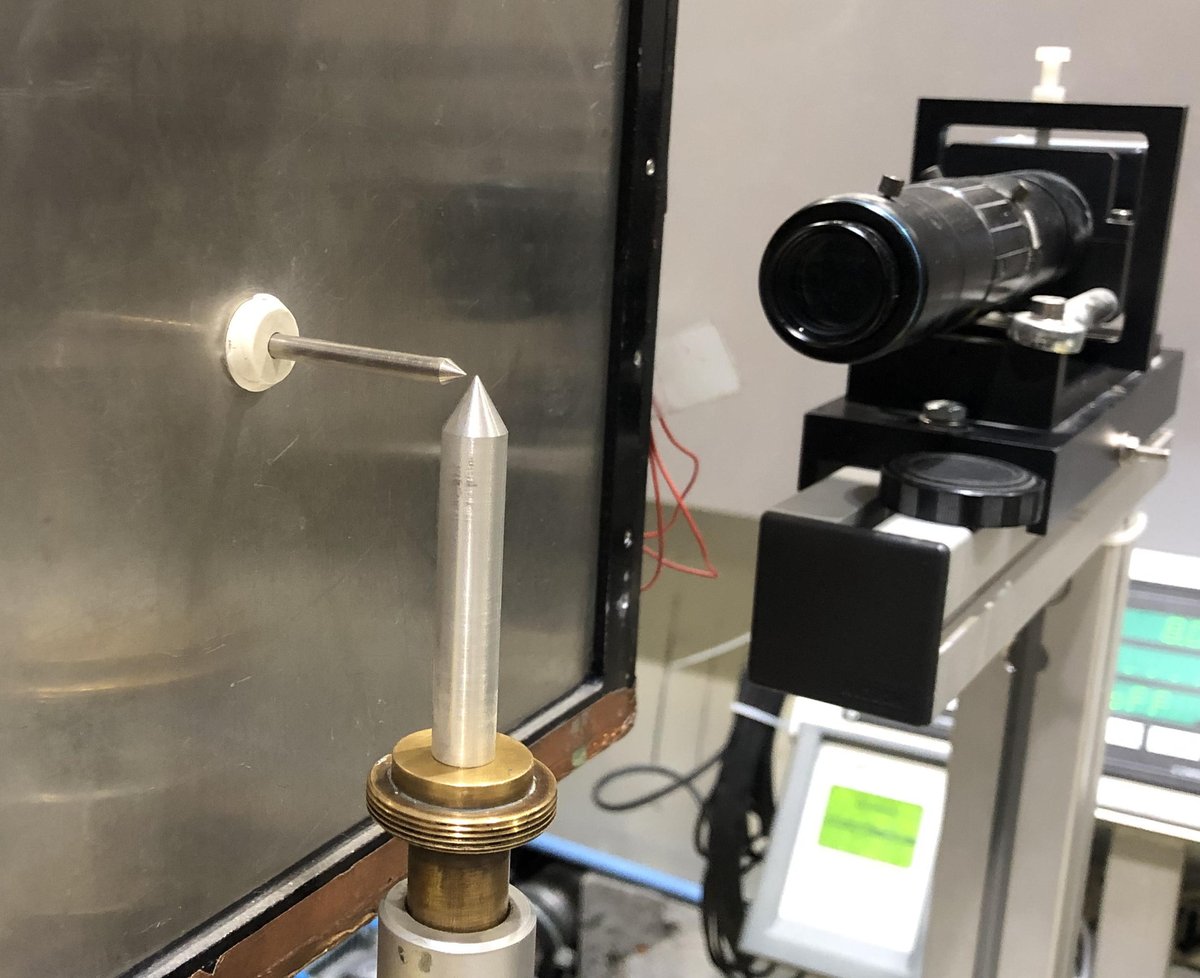
In a pinch, it is also possible to use the pin and the 4 mm aperture from the useful drawer.
Be very careful with the procedure, as the detector is FRAGILE!
- Move the detector away from the sample to give yourself room.
- Carefully install the 4 mm aperture at the front of the detector.
- Put the pin in the 4 mm aperture, with the point projecting 2 - 3 cm towards the sample.
- Carefully move the detector towards the sample.
- The pin indicates the beam direction. Align the sample relative to the pin.
- On completion, move the detector away from the sample, carefully remove the pin and install your appropriate aperture.
- Move the detector back to the desired sample-detector distance.