application/pdf •
19.7 MB
Search
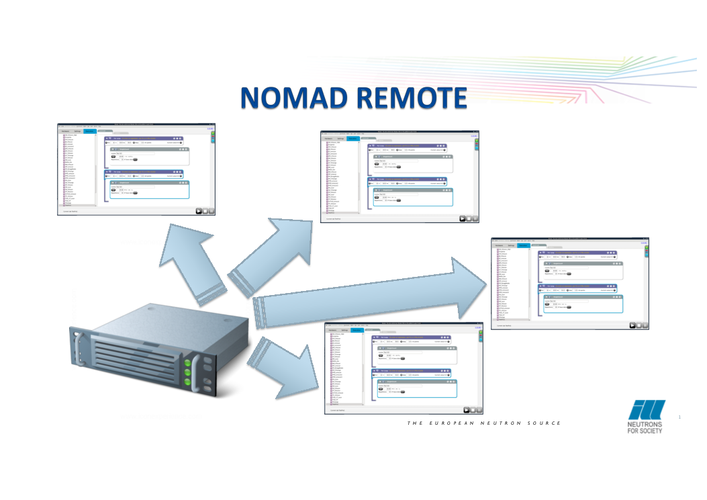
NOMAD is ILL’s open-source software for instrument control.
The ILL has setup a system to remotely control experiments and allow users not able to travel to actively participate in data acquisition.
The system is based on virtual machines running on any web browser (therefore no need to install anything) on which you can run an instance of the graphical interface of the NOMAD instrument control system.
All interfaces read information from the server running on the instrument computer and they are able to interact in real-time: modifying the workflow, adding tasks and looking at the data as if you were right next to the instrument.
Of course, access to this tool is restricted in accordance with the ILL data policy, and you can interact with the instrument only when the experiment you’re involved in is actually running.
Paolo Mutti
Head of Service
mutti@ill.fr
Tel. +33 4 76 20 72 23