Silxview
NOMAD data files are saved in a Nexus format. You can view the contents of the NEXUS file using the Silxview programme.
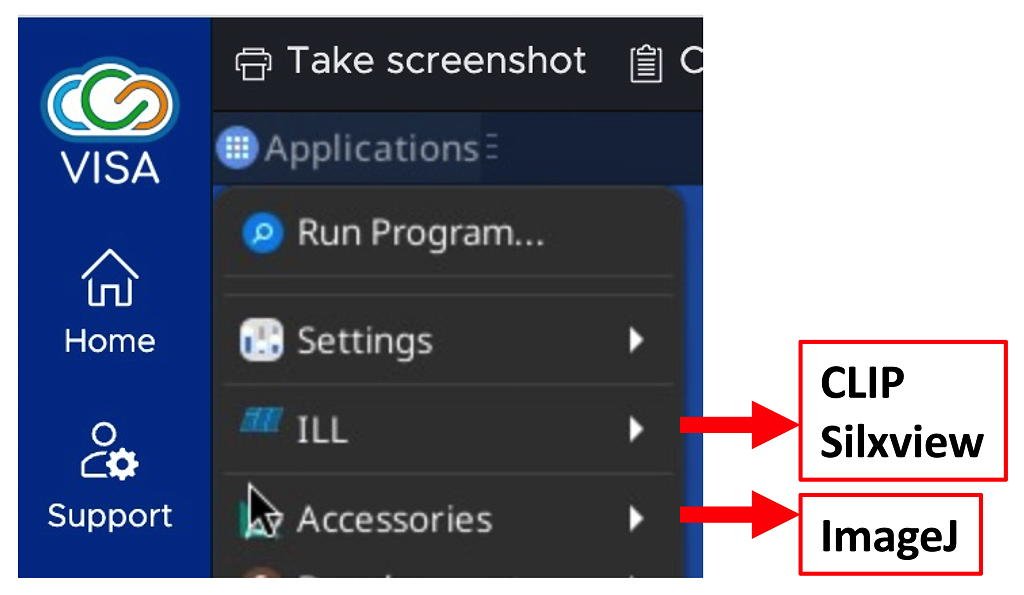
Silxview can be installed and opened by following the VISA menu path:
Applications : ILL
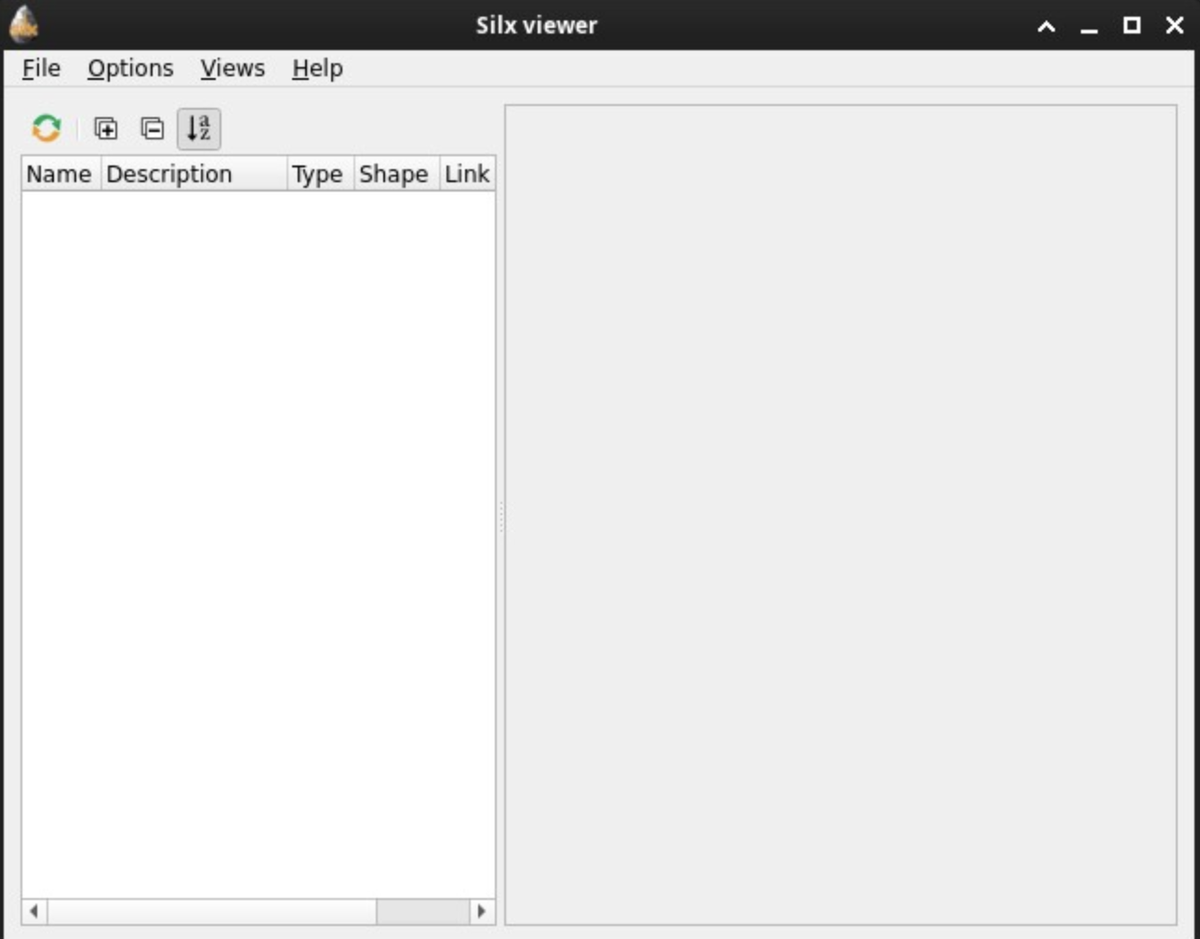
Starting Silxview will open a window on your VISA session.
Data can be loaded by following the Silxview menu path:
File : Open...
If you logged in with your proposal number, your Nexus data will be found in the directory:
/home/<username>/MyData/byInstrument/orient/exp_<proposal>_<cycle>_orient/rawdata
where:
<proposal> is your proposal number (e.g. 10-01-1234)
<cycle> is the cycle number (e.g. 261 is the first cycle from 2026).
If you logged in using internalUse, your Nexus data will be found in the directory:
/net4/serdon/illdata/<cycle>/orient/internalUse/rawdata
If you logged in using internalUse and are wanting to look at data from the current cycle, your can also find you Nexus data in the directory:
/net4/serdon/illdata/data/orient/internalUse/rawdata
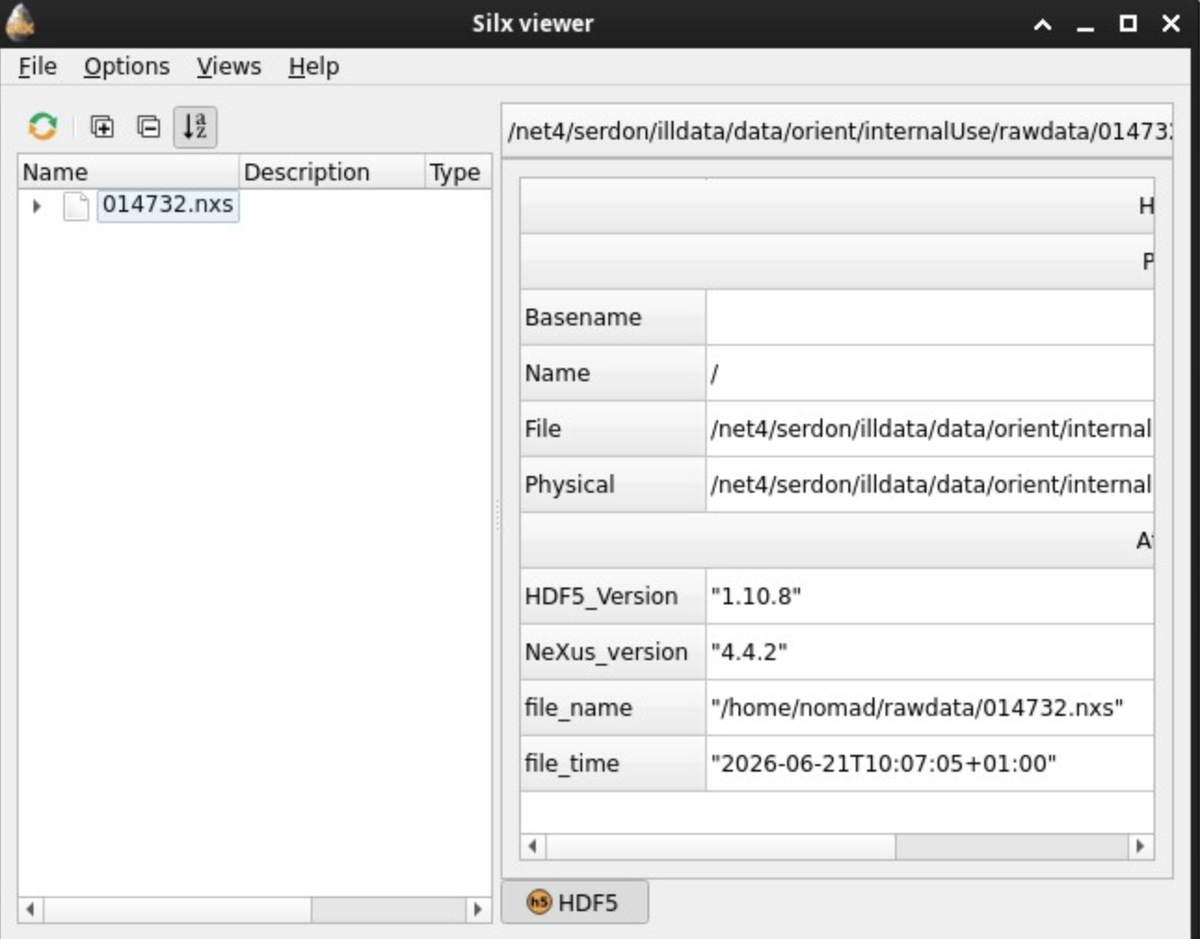
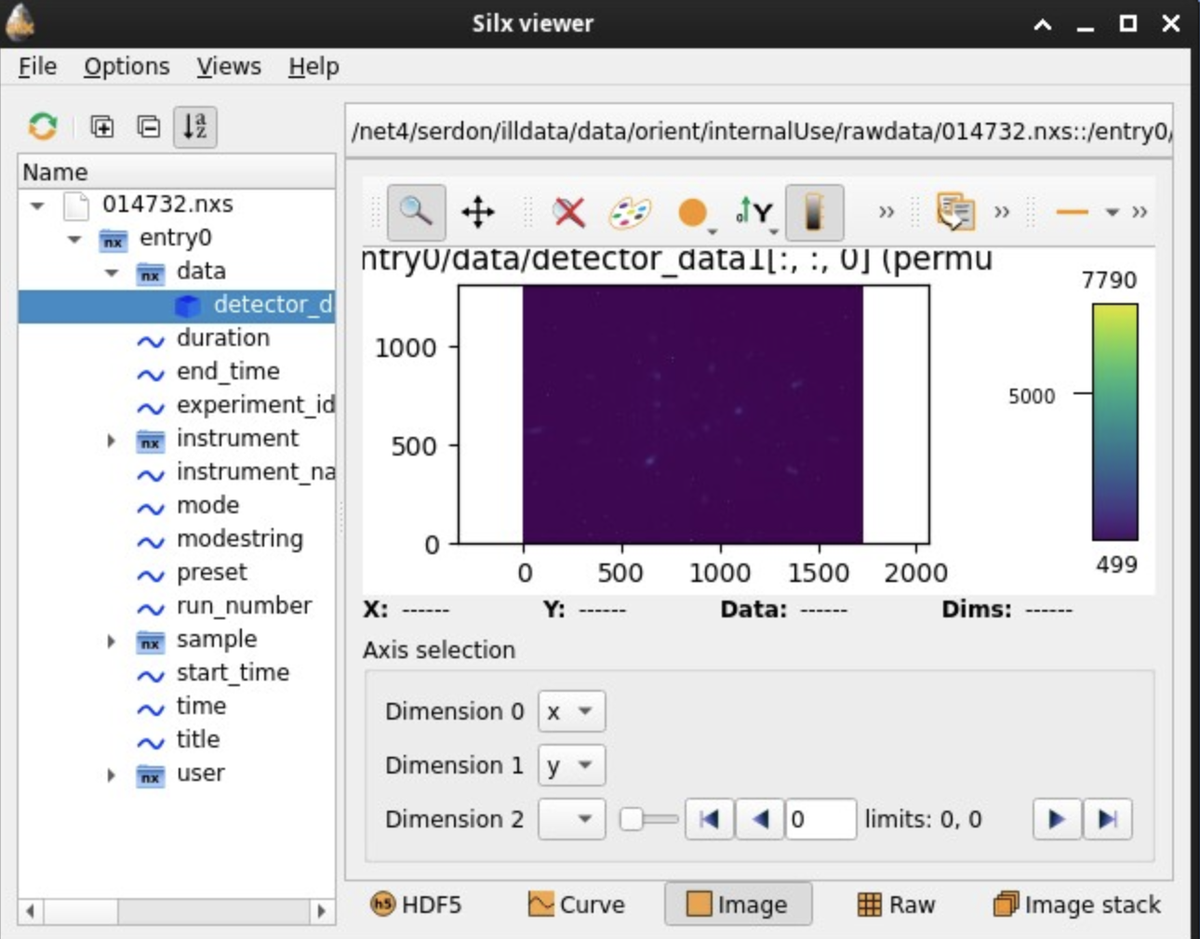
Once you correctly choose a file number, the number will appear in the left-hand side of the Silxview window, with a small triangle ► to its left.
Clicking the triangle will show the next level of the file hierarchy, again with a small triangle to the left. Continue to expand the hierarchy to the level:
<file number>.nxs : entry0 : data : detector_data
Your Silxview window should now look something like this:
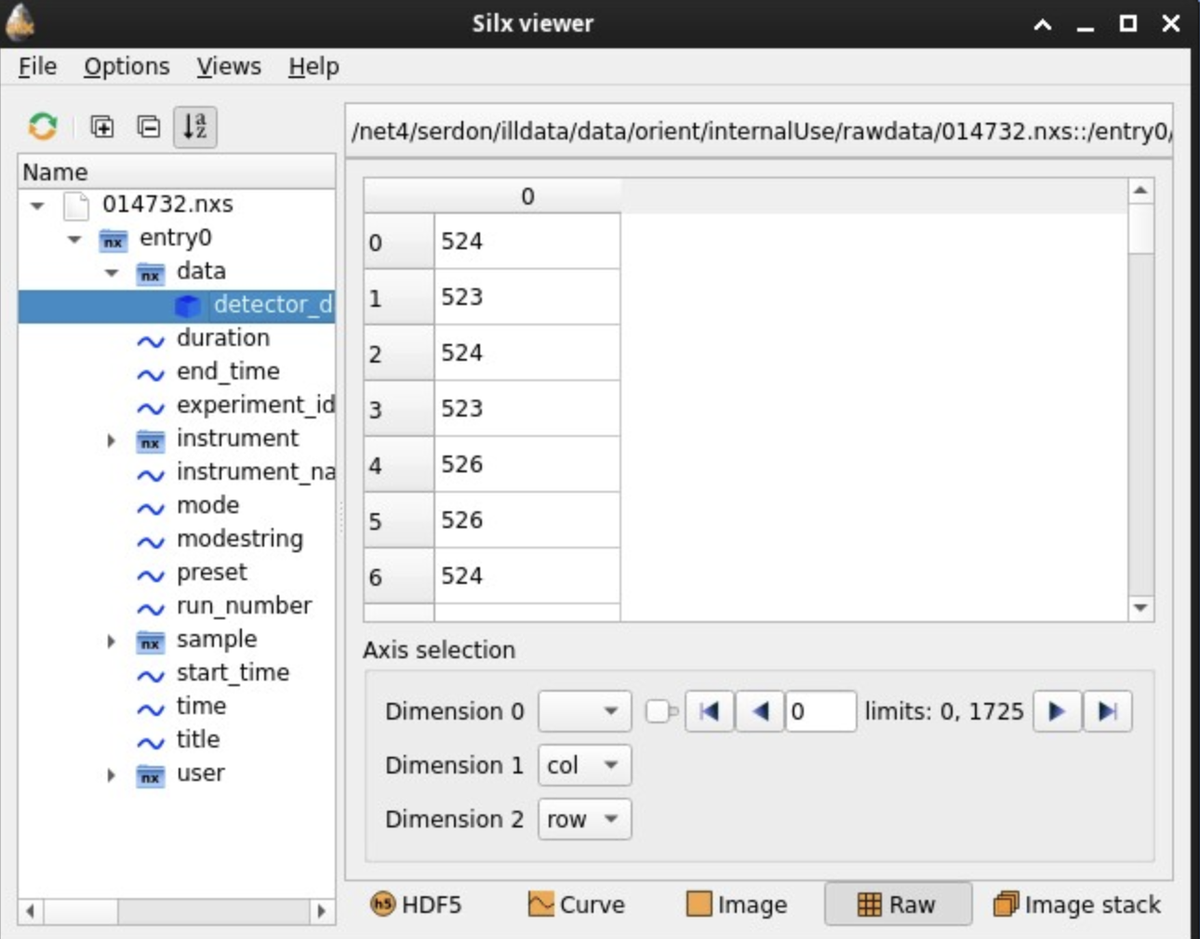
Click the Image tab at the bottom of the Silxview window, and then arrange the data dimensions to have:
- Dimension 0 : x
- Dimension 1 : y
- Dimension 2: <blank>
Colormaps and intensity scales can be adjusted by clicking on the Paint Palette icon above the image.
This will open a separate window.
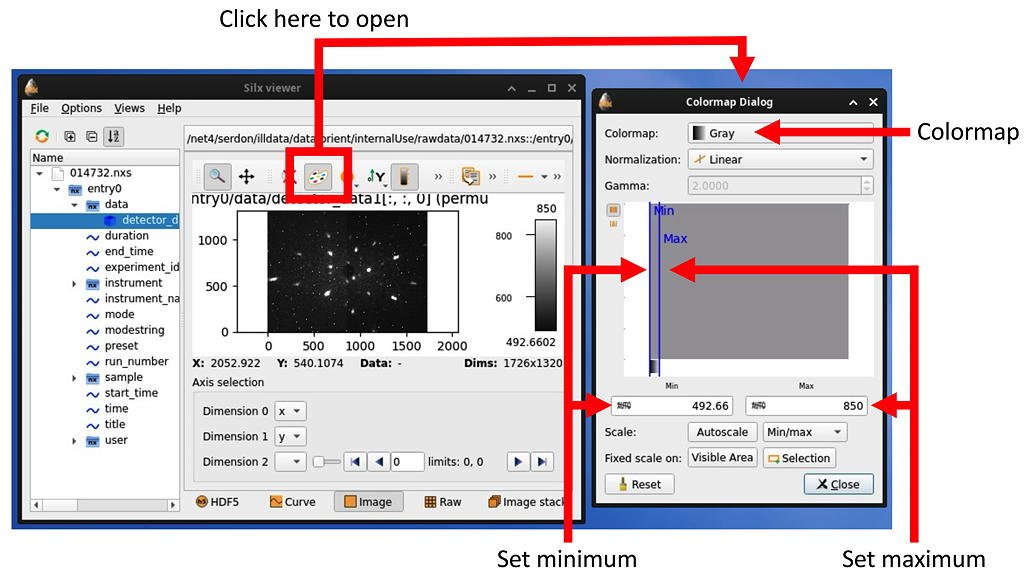
We recommend that you select the Gray colormap.
Maximum and minimum intensities can be adjusted by either:
- Click and drag the vertical blue lines labelled 'Max' and 'Min' in the gray square
- Manually enter values in the 'Max' and 'Min' data fields.
It is most likely that you will only have to adjust the maximum. The minimum is normally roughly correct.
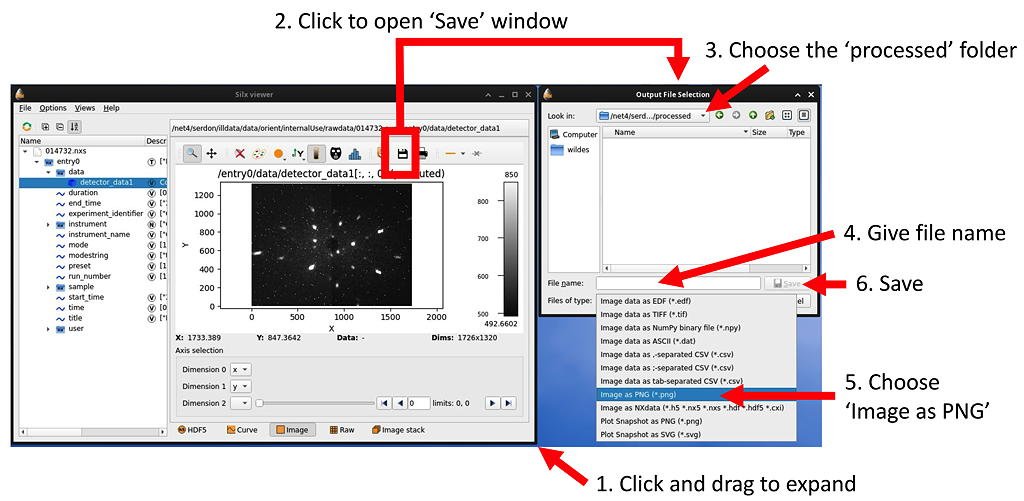
An adjusted Silxview image can be exported in a format that can be read into CLIP.
- Increase the size of the Silxview window by clicking and dragging the lower right-hand corner. You will see a Diskette icon.
- Clicking the Diskette icon will open the Output file selection window.
- The rawdata directory is read-only. You can save your exported image into the processed directory, which is accessible from the parent to the rawdata directory.
- Enter a file name in the field.
- CLIP will read TIFF and PNG files. You must select the appropriate output file format. If you choose PNG, be sure to choose the Image as PNG option.
- You can now click the Save button.
Silxview can currently be run on the NOMAD server, enabling you to look at and manipulate your NEXUS data without needing VISA.
However, this option is not recommended!
There is no means transfer modified and exported images to the central ILL data server (serdon).
Furthermore, the ILL is in the process of insulating the NOMAD servers from any external access (putting them in a 'bubble'). Current access could be removed at any time.
Silxview can be run by clicking the icon at the bottom of the right-hand side of the right-hand monitor on NomadGUI.

The NEXUS files may be found in the directory:
/home/nomad/rawdata